Introduction
In Loopin’ Louie, a battery-powered motor placed in the center of the table rotates a boom with a little plastic plane. Four radial arms lead out to the players’ barns and the chickens they’re trying to protect. Each barn has a little lever, which is used to knock the rotating plane away from your chickens and hopefully into someone else’s. When only one player has chickens remaining, he or she wins the game.
I couldn’t help myself to hack it with 2 awesome modes:
- Manual : Change the rotation speed manually with the potentiometer
- Auto : Randomly change the rotation speed, including reverse ^^

Hardware
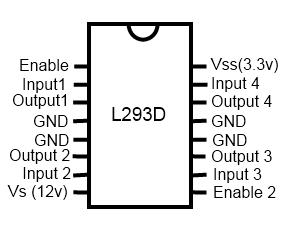
The Dual H-Bridge L293D contains two full H-bridges (four half H-bridges). That means you can drive four solenoids, two DC motors bi-directionally, or one stepper motor. The perfect Chip to control the motor’s speed.
Those chips are good for under 600 mA since that’s the limit of this chip. They do handle a peak of 1.2A but that’s just for a short amount of time. They run at 5V logic, Good for motor voltages from 4.5V up to 36V. The motor voltage is separate from the logic voltage. Datasheet
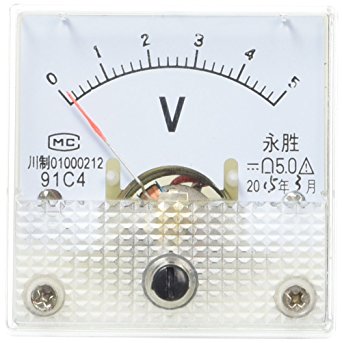
To monitor the speed, I used a 5V analog voltmeter. This analog panel meter measures DC voltage from 0-5 volts with 2.5% accuracy.
Parts
- 1 x Looping Louie
- 1 x L293D
- 1 x 5V Analog Voltmeter
- 2 x LEDs
- 2 x Switches
- 1 x Arduino Uno
- 1 x Protoboard
- 1 x Potentiometer
- 1 x Power Input Socket
- 1 x 9V Power Supply
- Wires
Wiring
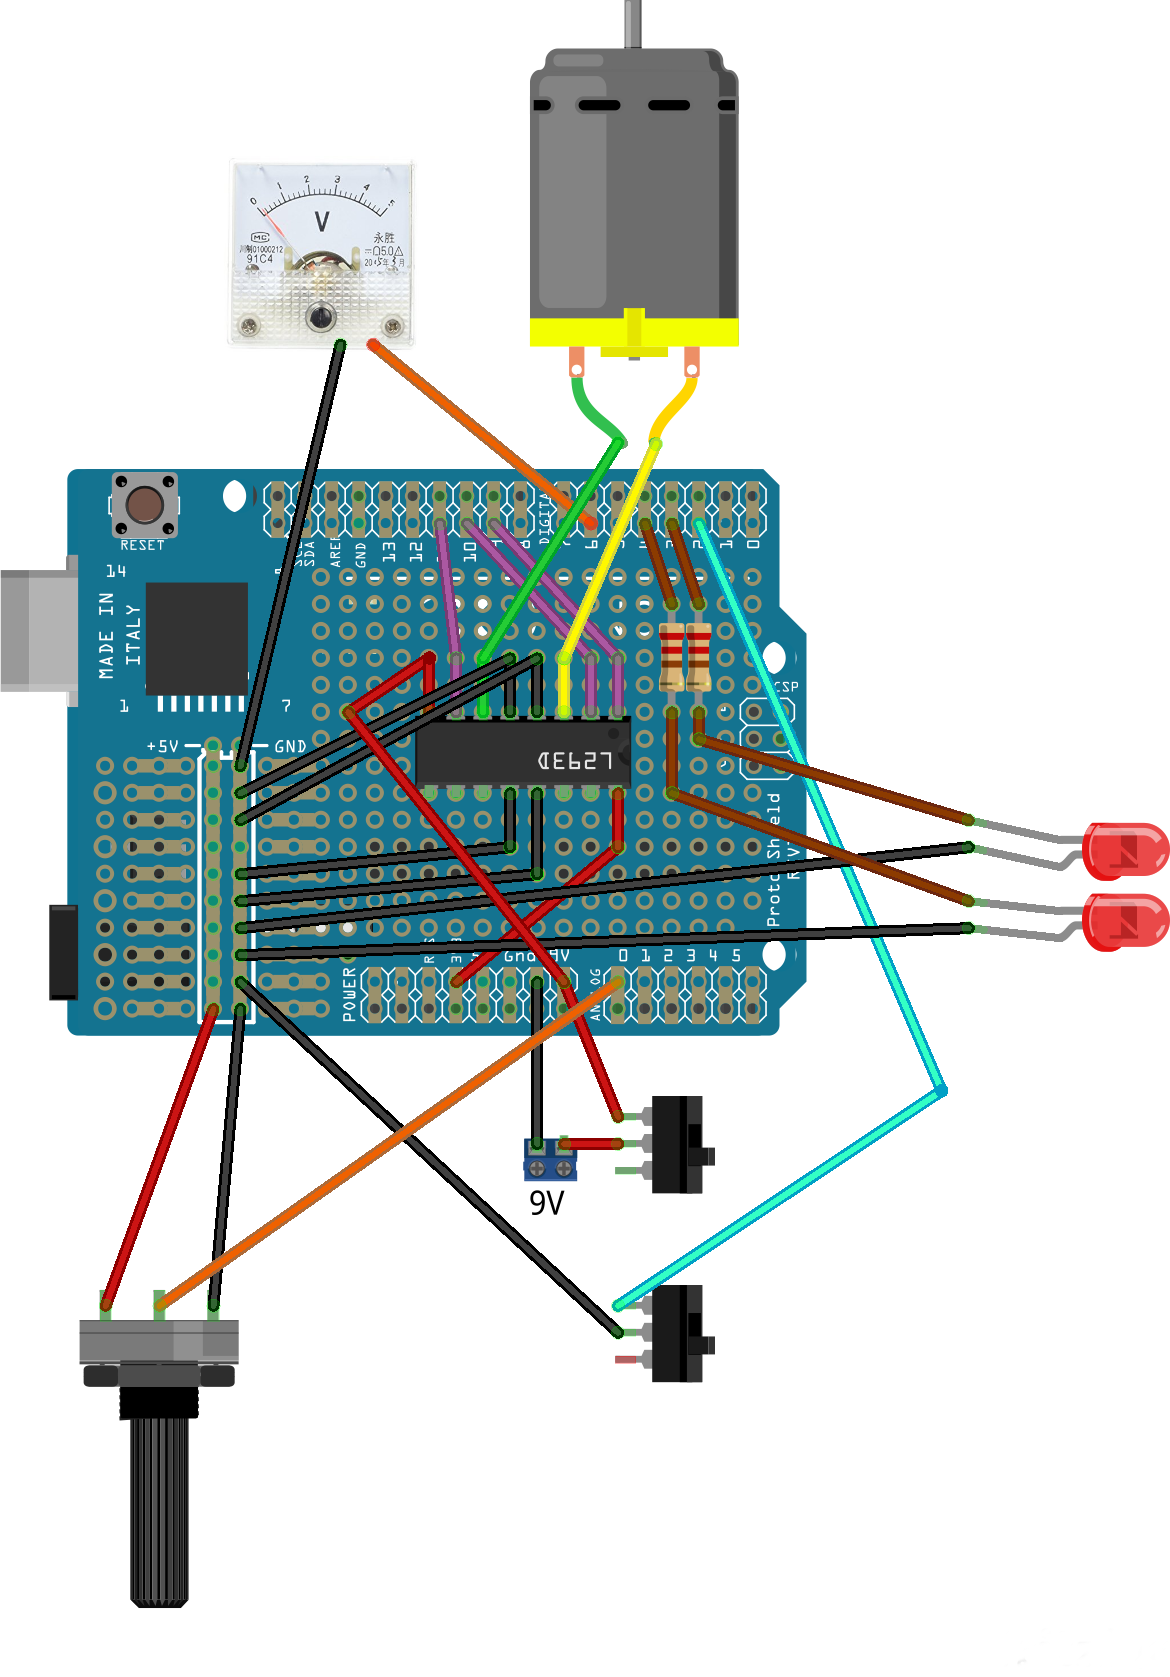
- The Power Switch : Classic on/off switch which closes the circuit (9V Input)
- The “Mode” Switch : Classic switch which closes the circuit from the dedicated Pin. It allows to select the Automatic or Manual Mode. No need for resistor here as I use the internal Pull Up (INPUT_PULLUP)</p>
- LEDs : Connected to the dedicated Pins (Resistor needed)
- The Pot : The Potentiometer allows to control the speed in Manual Mode. The Arduino reads the value from an Analog Pin
- The Monitor : The Monitor displays the value from the dedicated Pin (0 to 5V)
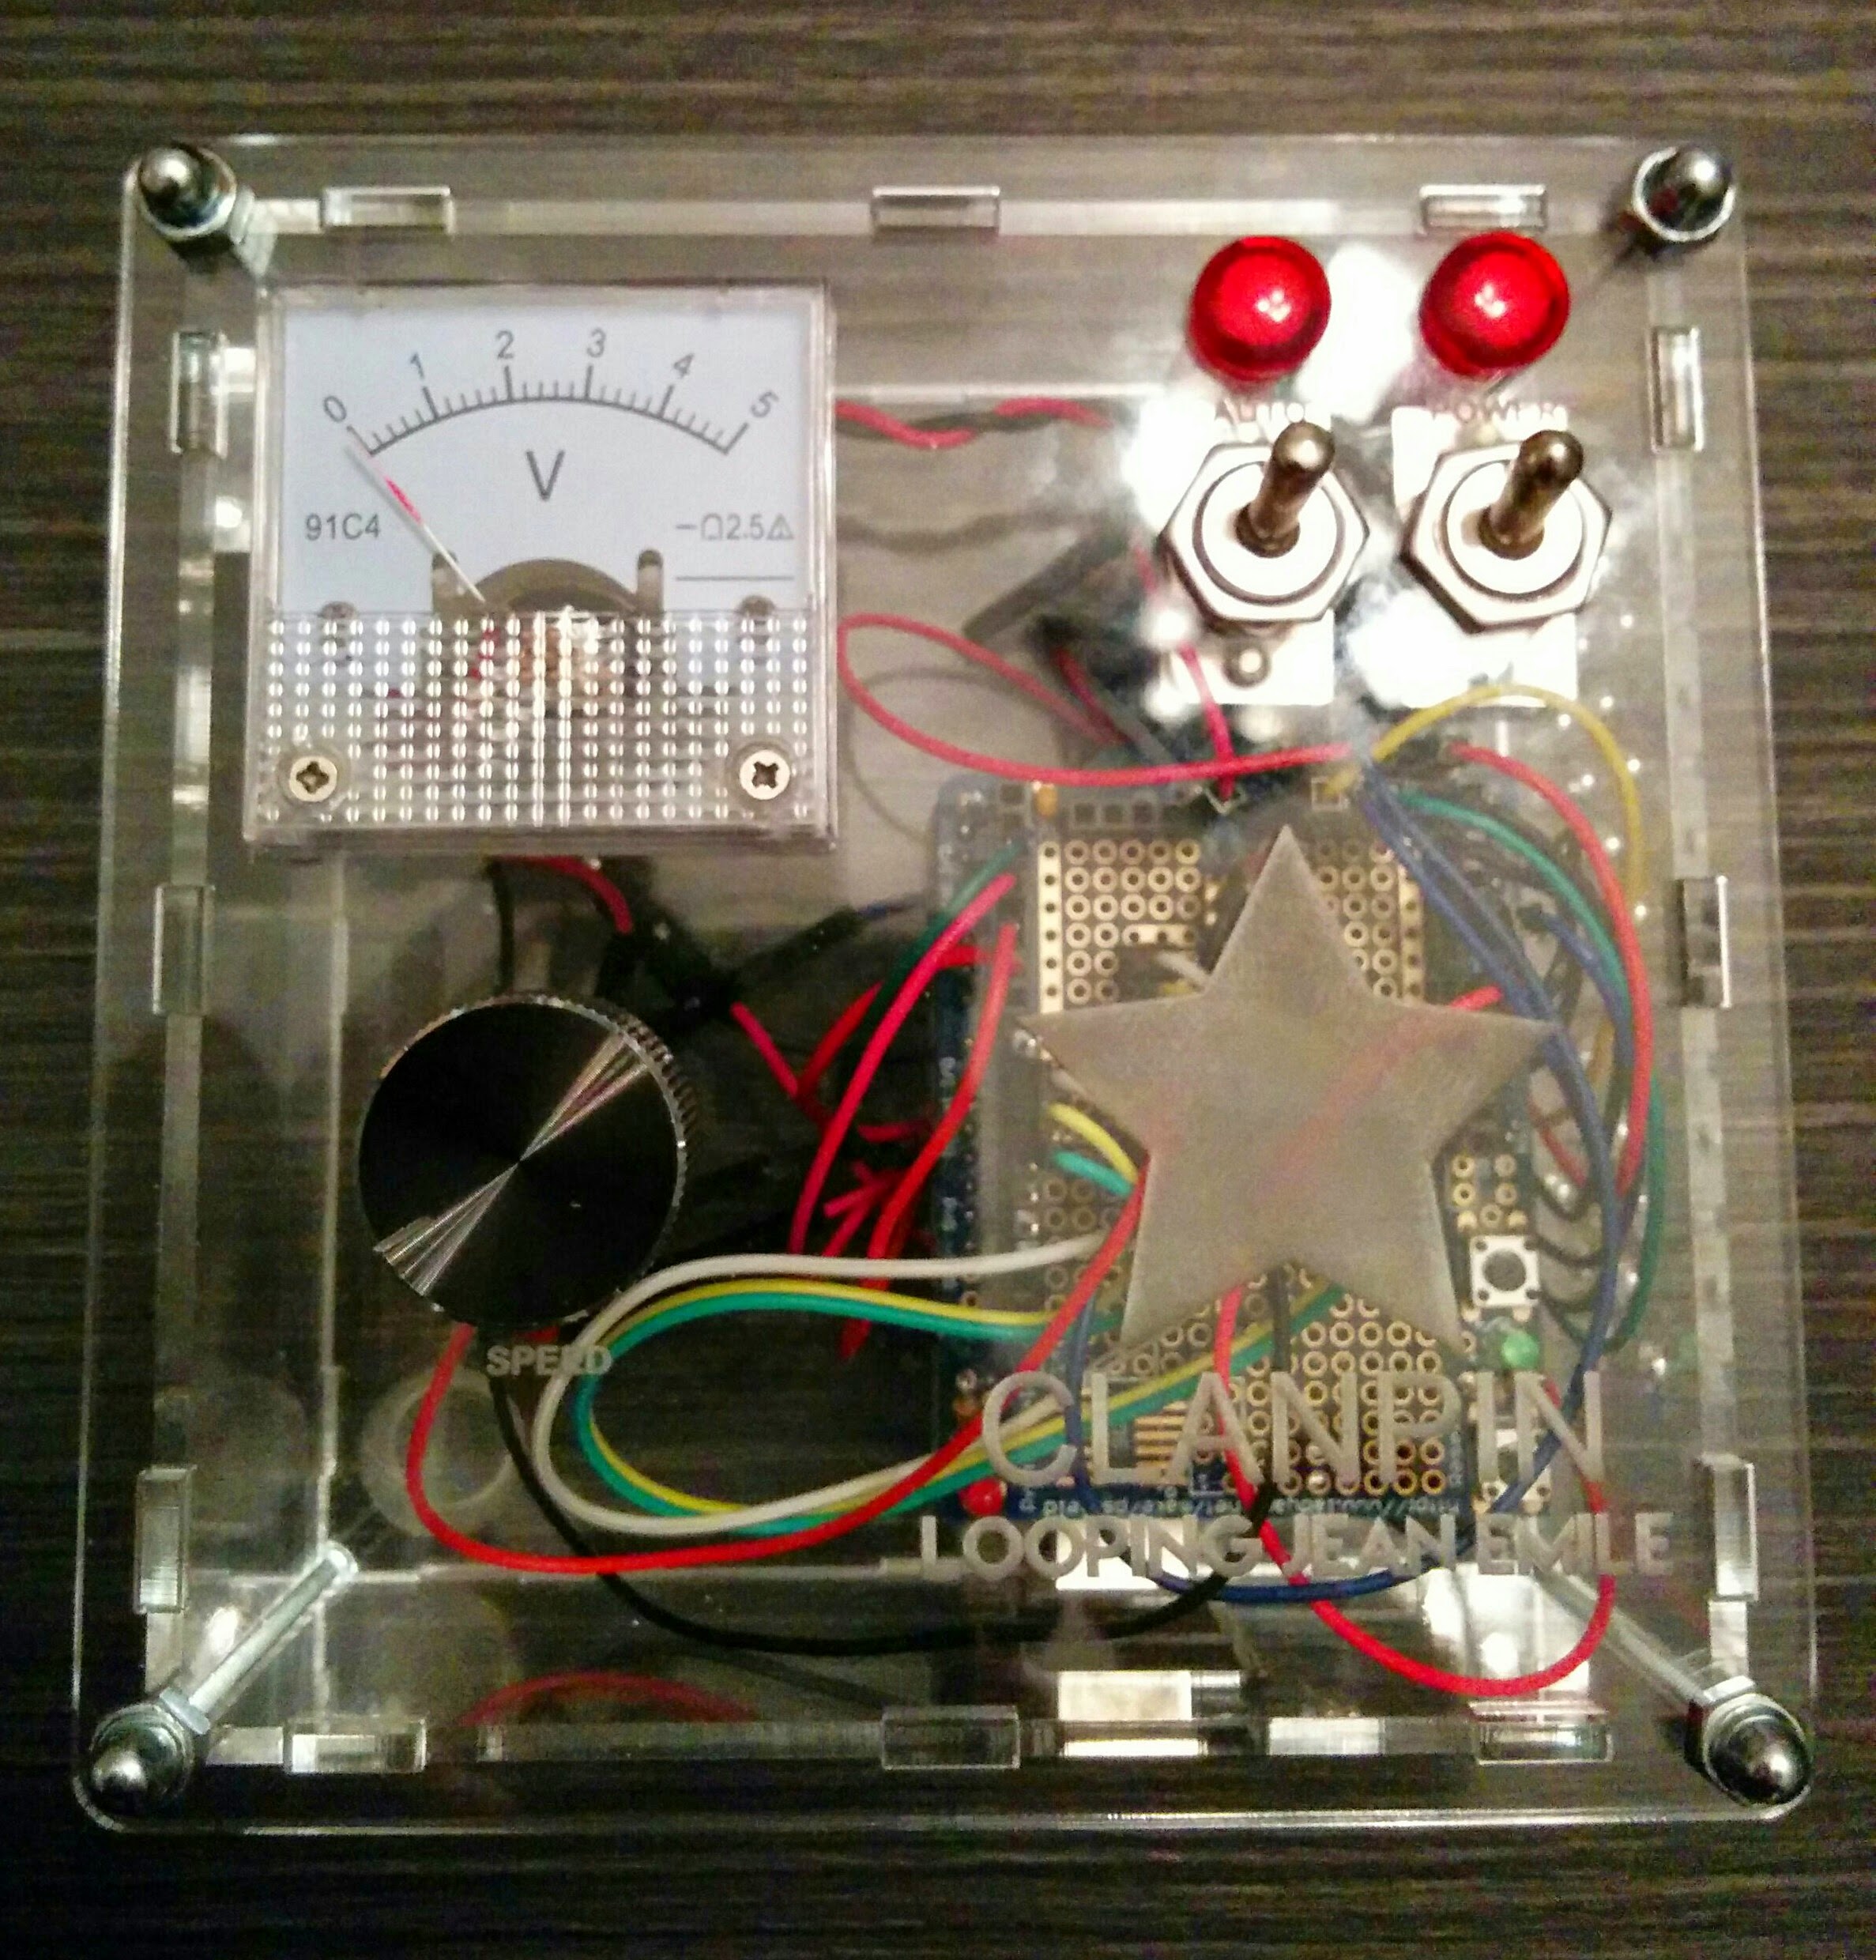
Enclosure
I also designed a PVC Enclosure made via Ponoko Services.
Code
see files here